はじめに
2024/8/24にSupabase AuthでAuth0, Firebase, AWS Cognitoのサポートがアナウンスされました。
https://supabase.com/blog/third-party-auth-mfa-phone-send-hooks
ただ公式の記事にはAWS Amplify経由で利用したサンプルしかないため、今回はAWS Cognitoを素の状態で利用する方法を説明したいと思います。
https://supabase.com/docs/guides/auth/third-party/aws-cognito?queryGroups=cognito-create-client&cognito-create-client=ts
※もっとスマートな方法があるかもしれません。その点ご了承ください。
事前準備
AWS Cognito
AWS Cognitoでユーザプールを作成してください。
ユーザプールIDとユーザプールクライアントのIDは後で利用するため、どこかに控えておきましょう。
Supabase
Proプラン以上の課金を行ったアカウントでプロジェクトを作成してください。
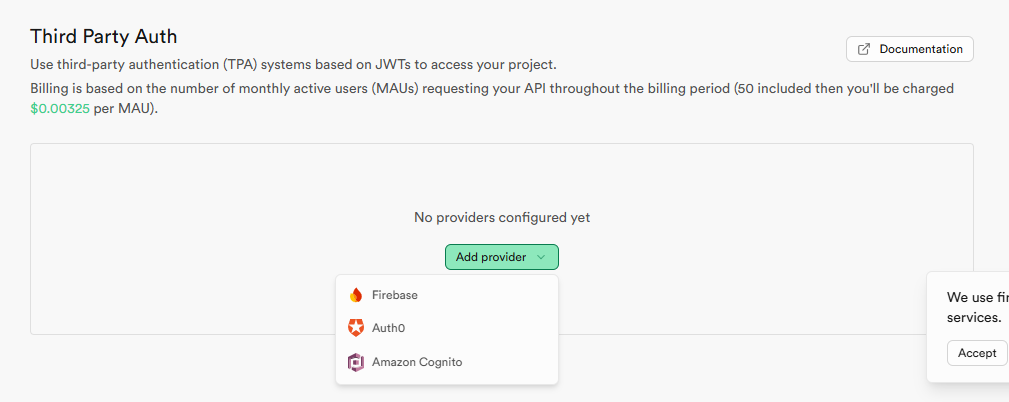
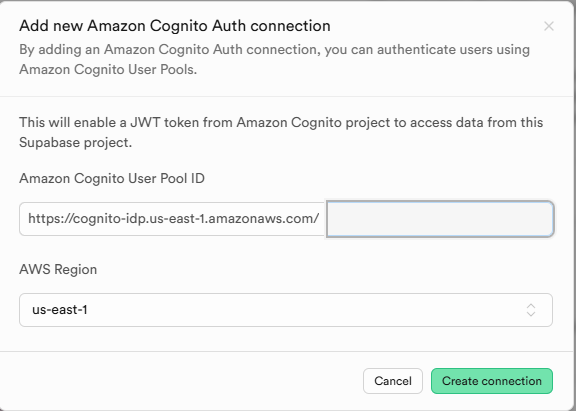
作成後、今回のサードパーティ認証を利用できるようにするため、Project SettingsのAuthenticationsにあるThird Party Auth項目でプロバイダを追加しましょう。
Next.js
接続確認のためのサンプルアプリを一応作っておきます。
※設定項目でAppRouterは無効化しました。有効化してもいけるかもしれませんが設定が面倒なので無効化しています。
npx create-next-appCognitoとSupabaseを利用するための追加のライブラリを入れておきます。
yarn add @aws-sdk/client-cognito-identity-provider @supabase/ssr @supabase/supabase-js aws-jwt-verify.env.localを作成して下記の環境変数を追加します。
NEXT_PUBLIC_SUPABASE_URL=
NEXT_PUBLIC_SUPABASE_ANON_KEY=
NEXT_PUBLIC_USER_POOL_ID=
NEXT_PUBLIC_CLIENT_ID=
ここまでで事前準備は終わりです。
Supabaseのテーブル作成
認証ができたことを確認するため、RLSを設定したテーブルと適当な行を追加しておきます。
テーブルとデータはこんな感じです。

RLSのポリシーは下記のSQLから設定してください。
CREATE POLICY "Authenticated users can read sample data"
    ON public.sample
    FOR SELECT
    USING (auth.jwt() ->> 'sub' IS NOT NULL);
Next.js側の実装
では次にNext.jsの実装を始めます。
今回は確認できればいいのでpages/index.tsxのみ修正します。
ファイル全体がこちらです。
'use client';

import { useState, useEffect } from 'react';
import { createClient } from '@supabase/supabase-js'
import { CognitoJwtVerifier } from "aws-jwt-verify";
import { CognitoIdentityProviderClient, ConfirmSignUpCommand, InitiateAuthCommand, SignUpCommand } from "@aws-sdk/client-cognito-identity-provider";

const cognitoClient = new CognitoIdentityProviderClient({ region: "us-east-1" });
const USER_POOL_ID = process.env.NEXT_PUBLIC_USER_POOL_ID as string;
const CLIENT_ID = process.env.NEXT_PUBLIC_CLIENT_ID as string;

const verifier = CognitoJwtVerifier.create({
  userPoolId: USER_POOL_ID,
  tokenUse: "access",
  clientId: CLIENT_ID,
});

function App() {
  const [sampleData, setSampleData] = useState<any[]>([]);
  const [session, setSession] = useState<any>(null);
  const [email, setEmail] = useState("");
  const [password, setPassword] = useState("");
  const [confirmationCode, setConfirmationCode] = useState("");
  const [isConfirmingSignUp, setIsConfirmingSignUp] = useState(false);

  const fetchSampleData = async (accessToken: any) => {
    try {
      const supabase = createClient(
        process.env.NEXT_PUBLIC_SUPABASE_URL as string,
        process.env.NEXT_PUBLIC_SUPABASE_ANON_KEY as string, {
          accessToken: async () => {
            const token = await verifyToken(accessToken)

            console.log(token);

            // Alternatively you can use tokens?.idToken instead.
            if (!token) {
              return "";
            }

            return token
          },
      })

      const { data, error } = await supabase
        .from('sample')
        .select('*')

      console.log(data);
      if (error) throw error;

      setSampleData(data || []);
    } catch (error) {
      console.error('データ取得エラー:', error);
      alert('データの取得に失敗しました。');
    }
  };


  const verifyToken = async (token: string) => {
    try {
      const payload = await verifier.verify(token);
      setSession(payload);

      return token;
    } catch {
      setSession(null);
      localStorage.removeItem("accessToken");
    }
  };

  const signUp = async () => {
    try {
      const command = new SignUpCommand({
        ClientId: CLIENT_ID,
        Username: email,
        Password: password,
      });
      await cognitoClient.send(command);
      alert("サインアップ成功!確認コードをメールで確認してください。");
      setIsConfirmingSignUp(true);
    } catch (error) {
      console.error("サインアップエラー:", error);
      alert("サインアップに失敗しました。");
    }
  };

  const confirmSignUp = async () => {
    try {
      const command = new ConfirmSignUpCommand({
        ClientId: CLIENT_ID,
        Username: email,
        ConfirmationCode: confirmationCode,
      });
      await cognitoClient.send(command);
      alert("確認が完了しました。サインインしてください。");
      setIsConfirmingSignUp(false);
    } catch (error) {
      console.error("確認エラー:", error);
      alert("確認に失敗しました。");
    }
  };

  const signIn = async () => {
    try {
      const command = new InitiateAuthCommand({
        AuthFlow: "USER_PASSWORD_AUTH",
        ClientId: CLIENT_ID,
        AuthParameters: {
          USERNAME: email,
          PASSWORD: password,
        },
      });
      const response = await cognitoClient.send(command);
      const accessToken = response.AuthenticationResult?.AccessToken;
      if (accessToken) {
        localStorage.setItem("accessToken", accessToken);
        await fetchSampleData(accessToken);
      } else {
        throw new Error("Access tokenが未定義です");
      }
    } catch (error) {
      console.error("サインインエラー:", error);
      alert("サインインに失敗しました。");
    }
  };

  const signOut = () => {
    localStorage.removeItem("accessToken");
    setSession(null);
  };

  useEffect(() => {
    const initializeAuth = async () => {
      const token = localStorage.getItem("accessToken");
      if (token) {
        try {
          await fetchSampleData(token);
        } catch (error) {
          console.error("認証初期化エラー:", error);
          signOut();
        }
      }
    };

    initializeAuth();
  }, []);

  if (!session) {
    if (isConfirmingSignUp) {
      return (
        <main className="min-h-screen bg-gray-100 flex items-center justify-center">
          <div className="bg-white p-8 rounded-lg shadow-md w-96">
            <h1 className="text-2xl font-bold mb-4 text-center">確認コードを入力してください</h1>
            <input
              type="text"
              placeholder="確認コード"
              value={confirmationCode}
              onChange={(e) => setConfirmationCode(e.target.value)}
              className="w-full p-2 mb-4 border rounded"
            />
            <button
              onClick={confirmSignUp}
              className="w-full bg-blue-500 text-white p-2 rounded hover:bg-blue-600 transition duration-200"
            >
              確認
            </button>
          </div>
        </main>
      );
    }

    return (
      <main className="min-h-screen bg-gray-100 flex items-center justify-center">
        <div className="bg-white p-8 rounded-lg shadow-md w-96">
          <h1 className="text-2xl font-bold mb-4 text-center">ログインまたはサインアップ</h1>
          <input
            type="email"
            placeholder="メールアドレス"
            value={email}
            onChange={(e) => setEmail(e.target.value)}
            className="w-full p-2 mb-4 border rounded"
          />
          <input
            type="password"
            placeholder="パスワード"
            value={password}
            onChange={(e) => setPassword(e.target.value)}
            className="w-full p-2 mb-4 border rounded"
          />
          <div className="flex space-x-4">
            <button
              onClick={signIn}
              className="flex-1 bg-blue-500 text-white p-2 rounded hover:bg-blue-600 transition duration-200"
            >
              サインイン
            </button>
            <button
              onClick={signUp}
              className="flex-1 bg-green-500 text-white p-2 rounded hover:bg-green-600 transition duration-200"
            >
              サインアップ
            </button>
          </div>
        </div>
      </main>
    );
  }

  return (
    <main className="min-h-screen bg-gray-100 p-8">
      <div className="max-w-4xl mx-auto bg-white rounded-lg shadow-md p-8">
        <section className="mb-8">
          <h2 className="text-2xl font-bold mb-4">ユーザー情報</h2>
          <p className="mb-2">ユーザーID: <span className="font-semibold">{session.sub}</span></p>
          <p>トークン有効期限: <span className="font-semibold">{new Date(session.exp * 1000).toLocaleString()}</span></p>
        </section>

        <section className="mb-8">
          <h2 className="text-2xl font-bold mb-4">サンプルデータ</h2>
          <ul className="pl-5 list-none">
            {sampleData.map((item, index) => (
              <li key={index} className="mb-2 p-3 bg-gray-200 rounded-md shadow-sm hover:shadow-md transition-shadow duration-200">
                <span className="font-semibold text-gray-700">ID: </span><span className="text-blue-600">{item.id}</span>
                <br />
                <span className="font-semibold text-gray-700">テキスト: </span><span className="text-green-600">{item.text}</span>
              </li>
            ))}
          </ul>
        </section>

        <button
          onClick={signOut}
          className="bg-red-500 text-white px-4 py-2 rounded hover:bg-red-600 transition duration-200"
        >
          サインアウト
        </button>
      </div>
    </main>
  );
}

export default App;
実装の確認
ちゃんとサードパーティ認証が動くか確認してみましょう。
下記でローカルサーバを起動します。
yarn dev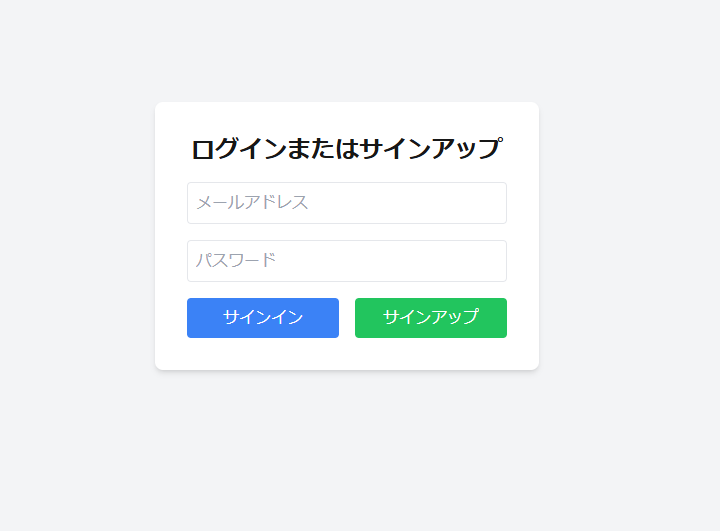
トップ画面でサインアップすると下記のメッセージが表示されメールが届きます。

画面も確認コードの入力画面に変更されます。
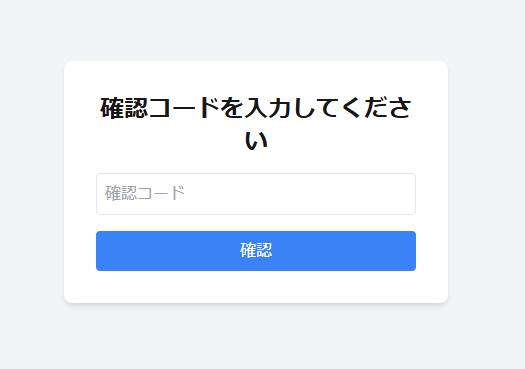
ここにメールに届いたコードを入力するとトップ画面に戻るので、サインインしましょう。
すると、ユーザ情報画面が表示されます。
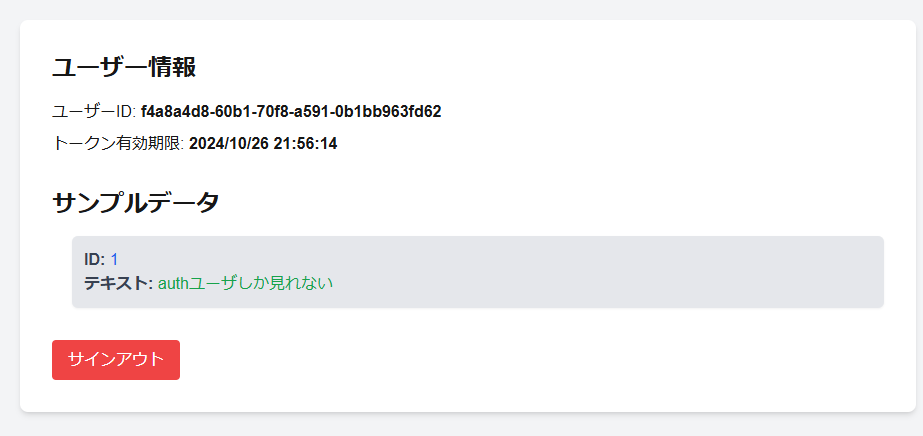
ちゃんとアクセストークンでサインインできたのでユーザIDとトークンの期限が表示されていますね。
また、テーブルの情報も表示されていることがわかります!
これでサードパーティ認証ができました。
まとめ
サードパーティ認証もシンプルに実装でき、Supabaseがさらに便利になりました。
これによって、以前弊社ブログで取り上げたLine ログインとの連携も可能になりますね!
(SupabaseはLineログインをサポートしていなかったので、これで選択肢が増えました。)

参考資料
githubリポジトリ:https://github.com/TodoONada/Supabase-Cognito-ThirdParty-Auth
- Next.js + SupabaseでTodoアプリ作成 CRUDの基本を学ぼう
- FirebaseとSupabaseの機能、料金、セキュリティ、AI観点などを含めて徹底比較
- Next.js とSupabaseで求人マッチングアプリを作る①
- 素早くアプリを作りたい! Vercel+Supabaseでプロジェクト開発
- Supabaseの機能一覧・解説 オープンソースのFirebase代替mBaaS
- Supabase CLIコマンド一覧
- Supabase RealtimeのBroadcast, Presenceを利用したキャンバス共有アプリを作る
- Supabaseのローカル開発環境を構築して開発体験を向上させつつ料金も節約
- Next.js + Supabaseでリアルタイムチャットを作ろう
- Next.js + Supabaseでソーシャルログインを実装する方法
- Next.js+Supabaseで認証機能を実装しよう【コード付き完全ガイド】
- Supabase + Next.jsで画像投稿アプリを最適化する(画像圧縮、ファイルサイズ制限、ファイルのアップロード数制限)
- OpenAI Embeddings API+ Supabase Vector Database + Next.jsでベクトル検索を実装する
- Supabase + AWS CognitoでAmplifyを利用せずサードパーティ認証する
- Supabaseでデータ更新があった時にSlack通知を送る
- Supabase Branchingでプレビュー環境を手に入れて開発体験を向上する
- Next.js + SupabaseでGraphQLを利用する方法
- SupabaseのEdge FunctionsとSendGridでメールを一斉送信する
- Supabaseで匿名認証とアカウントの本登録への昇格の方法
- Next.js + SupabaseでStorageを利用した画像投稿アプリ作成
- Next.js + SupabaseでRLSを利用して安全なアプリを作ろう。
- Next.js + SupabaseでAuth + Storageのストレージサービスを作る方法
- Next.jsとSupabaseで認証機能ありのリアルタイムチャットを作成する。
- Next.jsとSupabaseで認証つきチャットアプリを作成する(SNS風UI)
- Next.js + SupabaseでSMS認証を作成する方法
- Next.jsとSupabaseで全文検索を実装する方法
- Next.jsとSupabaseで作成したチャットアプリにお知らせ機能を実装する
- Nextjs + SupabaseでSupabaseのStorage Image Transformationsを利用する方法
- Supabase vs Neonの比較。機能や料金、セキュリティ、AIを徹底比較
- Supabaseのセルフホスティングをできるだけ安く行う方法
- Supabase + Cognitoの連携で外部連携を試す
- Supabase CLIのTesting機能を利用する
- Supabaseを利用する際に設定しておきたい項目

