今回からNext.jsとSupabaseを利用して求人マッチングアプリを作成します。
現在求人マッチングアプリに、大きな注目が集まっているのはご存知でしょうか?
IT業界をはじめ多くの企業が人手不足となっており、企業は採用に多大なコストと労力を支払っています。
単純に労働人口が減っていることもありますし、働き方や転職に対する意識の変化も相まって、求人マッチングや副業マッチングの市場規模が急拡大しているのです。
なお弊社では『マッチングワン』という『低コスト・短期にマッチングサービスを構築できる』サービスを展開しており、今回ご紹介するコードは、その『マッチングワン』でも使われているコードとなります。
ぜひ実際のプロダクトでどのような構成が行われているのか、注目していだければ幸いです。
Supabaseの準備
①:Supabaseプロジェクトの作成
Supabaseにログイン(登録していないければアカウント登録から)して、
トップページの「New Project」を押します。
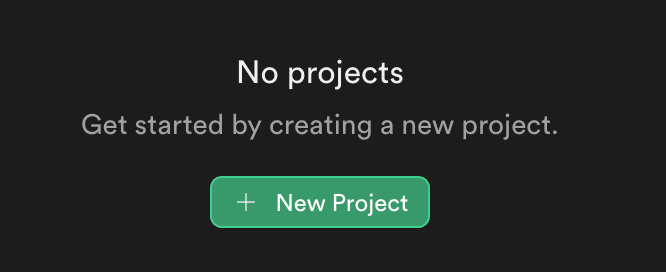
すると、下記の様な画面が表示されます。

適当なプロジェクト名とデータベースのパスワードを入れ、新しいプロジェクトを作成しましょう。
※Regionはできれば自分の住んでいる地域の近くがいいです。私は日本にしました。
②:ユーザタイプ定義テーブル作成
ユーザが求職者、企業、また管理者のどれにあたるかを判別するためテーブルを作成します。
新しいテーブル作成に進み、「mst_user_type」という名前のテーブルで、添付画像のような設定にて行を作成してください。
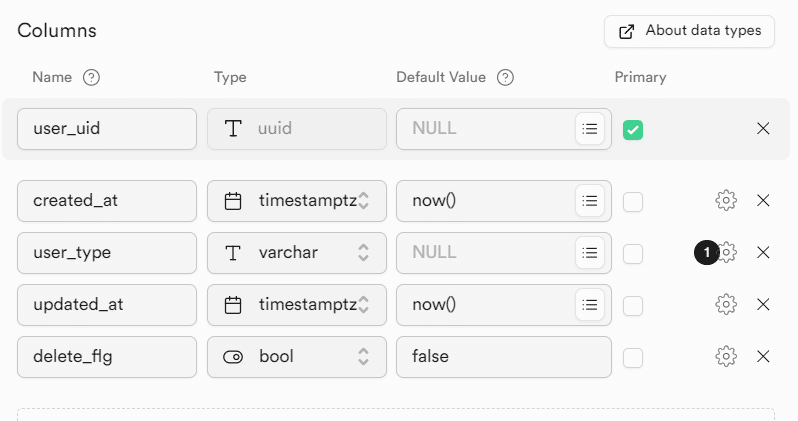
user_type以外はnullを許容しない設定に変更しましょう。
また、user_uidはauth.userのidを外部参照するように変更します。
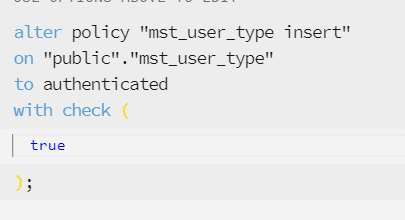
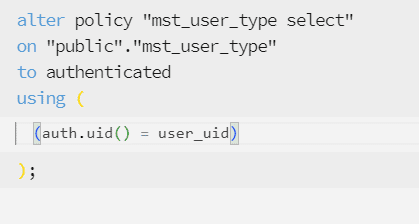
ポリシー作成
このままだとテーブルにアクセスできないため、ポリシーを作成します。
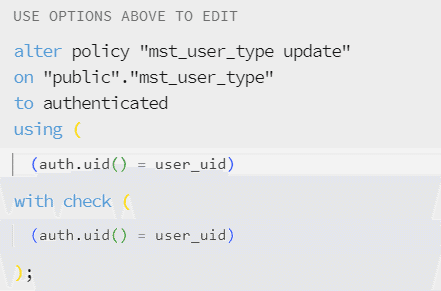
insert select updateの三つのポリシーを作成し、
それぞれ`Target Roles`は`Authenticated`に設定。
insert はtrue、それ以外のポリシーには`(auth.uid() = user_uid)`と入力してポリシーを保存してください。
③:ユーザ認証のトリガー作成
まずは、Supabaseダッシュボードの`SQL Editor`で下記のSQLを入力し実行します。
これによりmst_user_typeテーブルに、新規の行を追加する関数が作成されます。
CREATE OR REPLACE FUNCTION create_user_type()
RETURNS TRIGGER
language plpgsql
security definer set search_path = public
AS $$
BEGIN
    INSERT INTO mst_user_type(user_uid)
    VALUES (NEW.id);
    RETURN NEW;
END;
$$
その後、同様に下記のSQLも実行してください。
こちらはユーザ登録時に自動で上記の関数を実行するトリガーになります。
CREATE TRIGGER trigger_create_user_type
AFTER INSERT ON auth.users
FOR EACH ROW
EXECUTE FUNCTION create_user_type();
④:メール送信設定
デフォルトのメールサーバだと一時間に四通しか送れないため、smtpサーバを自前で立ち上げる必要があります。
詳しいやり方は今回割愛しますが、
Googleアカウントの管理画面から二段階認証のアプリパスワードを作成し、
- メールサーバ:smtp.gmail.com
- ポート番号:465
- パスワード:設定したアプリパスワード
で、`Project Setting`の`Authentication`から設定してください。
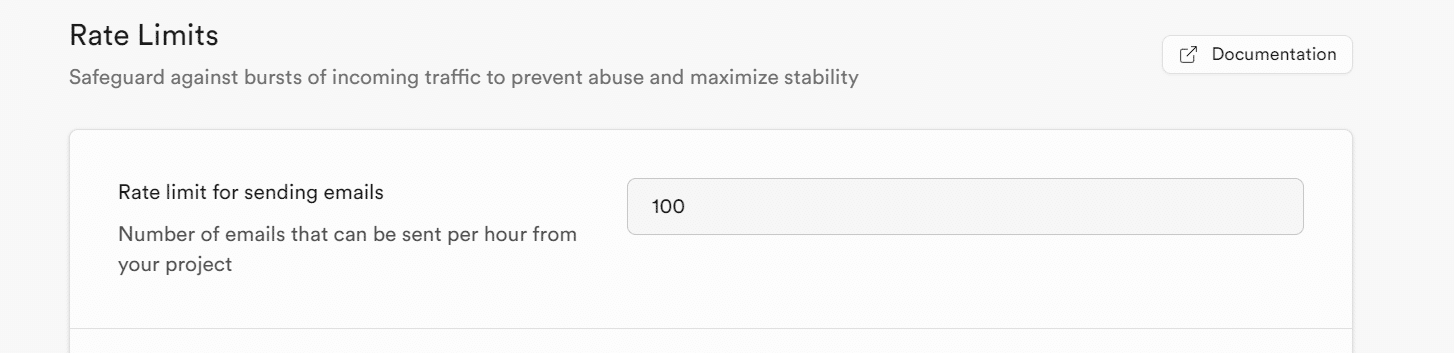
その後、`Authentications`の`Rate Limits`から一時間に送信できるメールの数を任意の値に変更してください。
(私は100通にしました。)
Next.js側準備
①:プロジェクト作成
npx create-next-app -e with-supabase②:環境変数追加
作成したプロジェクト内の`.env.example`ファイルを`.env.local`に変更し、
urlとanonキーを入力します。
両方ともSupabaseダッシュボードの`Project Settings`→`API Setting`に記述があります。
NEXT_PUBLIC_SUPABASE_URL={SupabaseのプロジェクトURL}
NEXT_PUBLIC_SUPABASE_ANON_KEY={Supabaseプロジェクトのanonキー}
#job_seekerか、companyの二つをアプリごと切り替えるための変数
NEXT_PUBLIC_USER_TYPE=job_seeker
その後、npm run devしてみてプロジェクトが立ち上がることが確認できればOKです。
Next.js ユーザ認証修正
現状のサンプルアプリで、すでに基本的なユーザ認証自体は出来上がっているため、これをベースに修正していきます。
①:Typescriptの型生成
テーブルデータをTypescriptで扱いやすいよう型生成します。
事前にプロジェクトフォルダの直下に`types`フォルダを作成し、その中に`supabase.ts`ファイルを作成します。
下記コマンドでSupabase CLIにログインします。
npx supabase loginその後、下記で型生成を行います。
$PROJECT_REFには作成したプロジェクトのURLの`https://supabase.com/dashboard/project/`以下の値を入力します。
npx supabase gen types typescript --project-id "$PROJECT_REF" --schema public > types/supabase.tsすると、`supabase.ts`内に型生成の結果が追記されるため確認できたらOKです。
②:不要ファイルの削除&新規ファイル作成
ファイル削除
不要なファイルの削除を行います。
不要ファイル・フォルダは下記です。
- app/login/submit-button.tsx
- app/protectedフォルダ
- componentsフォルダ
すべてまとめて削除してください。
(同名のファイルを後程作成する部分がありますが、内容や意味合いが元ファイルとかなり変わってくるため、一からファイルを作成します。)
ファイル作成
作成するファイルは下記です。
- app/resetpass/sendmail/page.tsx
- app/resetpass/page.tsx
- app/userpage/page.tsx
- components/userinfo/MainContents.tsx
- components/Footer.tsx
- components/Header.tsx
- components/SubmitButton.tsx
- components/UserInfo.tsx
- utils/userinfocontentstype.ts
- utils/usertype.ts
次はファイルの中身の修正を行っていきます。
③:基本レイアウトの修正
app/layout.tsx
全体レイアウトです。タイトルなど軽微な変更を行っています。
import "./globals.css";

const defaultUrl = process.env.VERCEL_URL
  ? `https://${process.env.VERCEL_URL}`
  : "http://localhost:3000";

export const metadata = {
  metadataBase: new URL(defaultUrl),
  title: "求職者と企業のマッチングサービス",
  description: "",
};

export default function RootLayout({
  children,
}: {
  children: React.ReactNode;
}) {
  return (
    <html lang="ja">
      <body className="bg-background text-foreground">
        <main className="min-h-screen flex flex-col items-center">
          {children}
        </main>
      </body>
    </html>
  );
}
app/page.tsx
トップページの見た目です。
import Footer from "@/components/Footer";
import Header from "../components/Header";

export default async function Index() {
  return (
    <div className="flex-1 w-full flex flex-col items-center">
      <Header />

      <div className="animate-in flex-1 flex flex-col opacity-0 max-w-4xl px-3">
        <main className="flex-1 flex flex-col gap-6"></main>
      </div>

      <Footer />
    </div>
  );
}
components/Header.tsx
ページのヘッダー部分の共通コンポーネントです。
ログインページ、ユーザページに遷移できます。
import { createClient } from "@/utils/supabase/server";
import Link from "next/link";
import { redirect } from "next/navigation";

export default async function Header() {
  const supabase = createClient();

  const {
    data: { user },
  } = await supabase.auth.getUser();

  const signOut = async () => {
    "use server";

    const supabase = createClient();
    await supabase.auth.signOut();
    return redirect("/login");
  };

  return (
    <nav className="w-full flex justify-center border-b border-b-foreground/10 h-16">
      <div className="w-full max-w-4xl flex justify-between items-center p-3 text-sm">
        {user ? (
          <div className="flex items-center gap-4">
            <Link href="/userpage">{user.email}</Link>
            <form action={signOut}>
              <button className="py-2 px-4 rounded-md no-underline bg-btn-background hover:bg-btn-background-hover">
                ログアウト
              </button>
            </form>
          </div>
        ) : (
          <Link
            href="/login"
            className="py-2 px-3 flex rounded-md no-underline bg-btn-background hover:bg-btn-background-hover"
          >
            ログイン
          </Link>
        )}
      </div>
    </nav>
  );
}
components/Footer.tsx
現状必要性は薄いですが一応フッターを作成しています。
弊社の名前とURLを入れていますが、お好きに変更してください。
export default function Footer() {
  return (
    <footer className="w-full border-t border-t-foreground/10 p-8 flex justify-center text-center text-xs">
      <p>
        Powered by{" "}
        <a
          href="https://todoonada.co.jp/"
          target="_blank"
          className="font-bold hover:underline"
          rel="noreferrer"
        >
          TodoONada株式会社
        </a>
      </p>
    </footer>
  );
}
④:基本的なユーザ認証周り
app/auth/callback/route.ts
認証後のルーティングで飛ばす先を`userpage`に変更しています。
また、mst_user_typeに行をトリガーで追加した後、現在の環境変数をもとにuser_typeを設定しています。
import { createClient } from "@/utils/supabase/server";
import { NextResponse } from "next/server";

export async function GET(request: Request) {
  // The `/auth/callback` route is required for the server-side auth flow implemented
  // by the SSR package. It exchanges an auth code for the user's session.
  // https://supabase.com/docs/guides/auth/server-side/nextjs
  const requestUrl = new URL(request.url);
  const code = requestUrl.searchParams.get("code");
  const origin = requestUrl.origin;

  if (code) {
    const supabase = createClient();
    await supabase.auth.exchangeCodeForSession(code);

    const {
      data: { user },
    } = await supabase.auth.getUser();

    if (user) {
      const { error } = await supabase
        .from("mst_user_type")
        .update({ user_type: process.env.NEXT_PUBLIC_USER_TYPE })
        .eq("user_uid", user.id);

      if (error) {
        console.log(error);
      }
    }
  }

  // URL to redirect to after sign up process completes
  return NextResponse.redirect(`${origin}/userpage`);
}
app/login/page.tsx
ログイン/ユーザ登録ページです。
日本語化したりパスワードリセットページへの導線を追加したりしています。
import Link from "next/link";
import { headers } from "next/headers";
import { createClient } from "@/utils/supabase/server";
import { redirect } from "next/navigation";
import { SubmitButton } from "../../components/SubmitButton";

export default function Login({
  searchParams,
}: {
  searchParams: { message: string };
}) {
  const signIn = async (formData: FormData) => {
    "use server";

    const email = formData.get("email") as string;
    const password = formData.get("password") as string;
    const supabase = createClient();

    const { error } = await supabase.auth.signInWithPassword({
      email,
      password,
    });

    if (error) {
      return redirect(
        "/login?message=%E3%83%A6%E3%83%BC%E3%82%B6%E8%AA%8D%E8%A8%BC%E3%81%AB%E5%A4%B1%E6%95%97%E3%81%97%E3%81%BE%E3%81%97%E3%81%9F%E3%80%82"
      );
    }

    return redirect("/userpage");
  };

  const signUp = async (formData: FormData) => {
    "use server";

    const origin = headers().get("origin");
    const email = formData.get("email") as string;
    const password = formData.get("password") as string;
    const supabase = createClient();

    const { error } = await supabase.auth.signUp({
      email,
      password,
      options: {
        emailRedirectTo: `${origin}/auth/callback`,
      },
    });

    if (error) {
      console.log(error);

      return redirect(
        "/login?message=%E3%83%A6%E3%83%BC%E3%82%B6%E8%AA%8D%E8%A8%BC%E3%81%AB%E5%A4%B1%E6%95%97%E3%81%97%E3%81%BE%E3%81%97%E3%81%9F%E3%80%82"
      );
    }

    return redirect(
      "/login?message=%E3%83%A6%E3%83%BC%E3%82%B6%E8%AA%8D%E8%A8%BC%E3%81%AE%E3%81%9F%E3%82%81%E3%83%A1%E3%83%BC%E3%83%AB%E3%82%92%E9%80%81%E4%BF%A1%E3%81%97%E3%81%BE%E3%81%97%E3%81%9F%E3%80%82%E3%81%94%E7%A2%BA%E8%AA%8D%E3%81%8F%E3%81%A0%E3%81%95%E3%81%84%E3%80%82"
    );
  };

  return (
    <div className="flex-1 flex flex-col w-full px-8 sm:max-w-md justify-center gap-2">
      <Link
        href="/"
        className="absolute left-8 top-8 py-2 px-4 rounded-md no-underline text-foreground bg-btn-background hover:bg-btn-background-hover flex items-center group text-sm"
      >
        <svg
          xmlns="http://www.w3.org/2000/svg"
          width="24"
          height="24"
          viewBox="0 0 24 24"
          fill="none"
          stroke="currentColor"
          strokeWidth="2"
          strokeLinecap="round"
          strokeLinejoin="round"
          className="mr-2 h-4 w-4 transition-transform group-hover:-translate-x-1"
        >
          <polyline points="15 18 9 12 15 6" />
        </svg>{" "}
        戻る
      </Link>

      <form className="animate-in flex-1 flex flex-col w-full justify-center gap-2 text-foreground">
        <label className="text-md" htmlFor="email">
          メールアドレス
        </label>
        <input
          className="rounded-md px-4 py-2 bg-inherit border mb-6"
          name="email"
          placeholder="you@example.com"
          required
        />
        <label className="text-md" htmlFor="password">
          パスワード
        </label>
        <input
          className="rounded-md px-4 py-2 bg-inherit border mb-6"
          type="password"
          name="password"
          placeholder="••••••••"
          required
        />
        <SubmitButton
          formAction={signIn}
          className="bg-green-700 rounded-md px-4 py-2 text-foreground mb-2"
          pendingText="ログイン中..."
        >
          ログイン
        </SubmitButton>
        <SubmitButton
          formAction={signUp}
          className="border border-foreground/20 rounded-md px-4 py-2 text-foreground mb-2"
          pendingText="会員登録中"
        >
          会員登録
        </SubmitButton>
        <div className="text-right">
          <Link
            className="font-medium text-blue-600 hover:underline inline-block"
            href={"/resetpass/sendmail"}
          >
            パスワードを忘れた場合
          </Link>
        </div>
        {searchParams?.message && (
          <p className="mt-4 p-4 bg-foreground/10 text-foreground text-center">
            {searchParams.message}
          </p>
        )}
      </form>
    </div>
  );
}
基本的な仕組みは元のままなので解説しませんが、ここの文字列は日本語を利用するために、UTF-8のデコードを行った文字列を流し込んでいます。
※今回は行いませんが、今後を考えるならば日本語文字列をコード内でデコードする仕組みを作成した方が良いと思います。
return redirect(
        "/login?message=%E3%83%A6%E3%83%BC%E3%82%B6%E8%AA%8D%E8%A8%BC%E3%81%AB%E5%A4%B1%E6%95%97%E3%81%97%E3%81%BE%E3%81%97%E3%81%9F%E3%80%82"
      );
⑤:パスワードリセット機能の実装
パスワードを忘れた場合に、再度パスワードを設定できるようパスワードリセットを実装します。
app/resetpass/sendmail/page.tsx
まずは初めにアクセスするメール送信画面を作成します。
import { createClient } from "@/utils/supabase/server";
import { redirect } from "next/navigation";
import { SubmitButton } from "@/components/SubmitButton";
import { headers } from "next/headers";
import Link from "next/link";
/**
* パスワードリセット前のメール送信用画面
*/
export default function ResetPassSendMail({
searchParams,
}: {
searchParams: { message: string };
}) {
const sendmail = async (formData: FormData) => {
"use server";
const origin = headers().get("origin");
const email = formData.get("email") as string;
const supabase = createClient();
const { error } = await supabase.auth.resetPasswordForEmail(email, {
redirectTo: `${origin}/resetpass`,
});
if (error) {
console.log(error);
return redirect(
"/resetpass/sendmail?message=%E3%83%A1%E3%83%BC%E3%83%AB%E9%80%81%E4%BF%A1%E3%81%AB%E5%A4%B1%E6%95%97%E3%81%97%E3%81%BE%E3%81%97%E3%81%9F%E3%80%82"
);
}
return redirect(
"/resetpass/sendmail?message=%E3%83%A1%E3%83%BC%E3%83%AB%E3%82%92%E9%80%81%E4%BF%A1%E3%81%97%E3%81%BE%E3%81%97%E3%81%9F%E3%80%82%E3%81%94%E7%A2%BA%E8%AA%8D%E3%81%8F%E3%81%A0%E3%81%95%E3%81%84%E3%80%82"
);
};
return (
<div className="flex-1 flex flex-col w-full px-8 sm:max-w-md justify-center gap-2">
<Link
href="/login"
className="absolute left-8 top-8 py-2 px-4 rounded-md no-underline text-foreground bg-btn-background hover:bg-btn-background-hover flex items-center group text-sm"
>
<svg
xmlns="http://www.w3.org/2000/svg"
width="24"
height="24"
viewBox="0 0 24 24"
fill="none"
stroke="currentColor"
strokeWidth="2"
strokeLinecap="round"
strokeLinejoin="round"
className="mr-2 h-4 w-4 transition-transform group-hover:-translate-x-1"
>
<polyline points="15 18 9 12 15 6" />
</svg>{" "}
戻る
</Link>
<form className="animate-in flex-1 flex flex-col w-full justify-center gap-2 text-foreground">
<h2 className="font-bold ">
アカウントに結びつけているメールアドレスを入力してください。
</h2>
<label className="text-md" htmlFor="email">
メールアドレス
</label>
<input
className="rounded-md px-4 py-2 bg-inherit border mb-6"
name="email"
placeholder="you@example.com"
required
/>
<SubmitButton
formAction={sendmail}
className="bg-green-700 rounded-md px-4 py-2 text-foreground mb-2"
pendingText="送信中..."
>
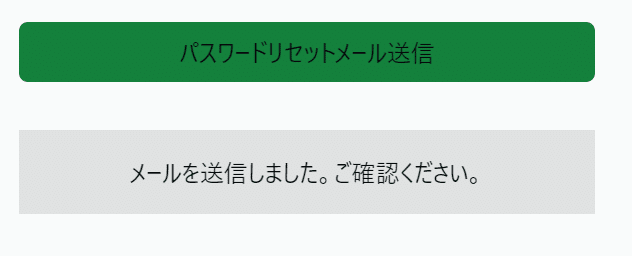
パスワードリセットメール送信
</SubmitButton>
{searchParams?.message && (
<p className="mt-4 p-4 bg-foreground/10 text-foreground text-center">
{searchParams.message}
</p
)}
</form>
</div>
);
}この部分で入力したメールアドレスへ、リセット用のリンクを送信しています。
const { error } = await supabase.auth.resetPasswordForEmail(email, {
      redirectTo: `${origin}/resetpass`,
    });
app/resetpass/page.tsx
リセット用のリンクからアクセスするページです。
import { createClient } from "@/utils/supabase/server";
import { redirect } from "next/navigation";
import { SubmitButton } from "@/components/SubmitButton";
import Link from "next/link";

/**
 * パスワードリセット用画面
 */
export default function ResetPass({
  searchParams,
}: {
  searchParams: { message: string; code: string };
}) {
  const resetPass = async (formData: FormData) => {
    "use server";

    const password = formData.get("password") as string;
    const supabase = createClient();
    supabase.auth.exchangeCodeForSession(searchParams.code);

    const { error } = await supabase.auth.updateUser({ password: password });

    if (error) {
      console.log(error);

      return redirect(
        "/resetpass/?message=%E3%83%91%E3%82%B9%E3%83%AF%E3%83%BC%E3%83%89%E6%9B%B4%E6%96%B0%E3%81%AB%E5%A4%B1%E6%95%97%E3%81%97%E3%81%BE%E3%81%97%E3%81%9F%E3%80%82"
      );
    }

    return redirect(
      "/resetpass?message=%E3%83%91%E3%82%B9%E3%83%AF%E3%83%BC%E3%83%89%E6%9B%B4%E6%96%B0%E3%81%AB%E6%88%90%E5%8A%9F%E3%81%97%E3%81%BE%E3%81%97%E3%81%9F%E3%80%82"
    );
  };

  return (
    <div className="flex-1 flex flex-col w-full px-8 sm:max-w-md justify-center gap-2">
      <Link
        href="/"
        className="absolute left-8 top-8 py-2 px-4 rounded-md no-underline text-foreground bg-btn-background hover:bg-btn-background-hover flex items-center group text-sm"
      >
        <svg
          xmlns="http://www.w3.org/2000/svg"
          width="24"
          height="24"
          viewBox="0 0 24 24"
          fill="none"
          stroke="currentColor"
          strokeWidth="2"
          strokeLinecap="round"
          strokeLinejoin="round"
          className="mr-2 h-4 w-4 transition-transform group-hover:-translate-x-1"
        >
          <polyline points="15 18 9 12 15 6" />
        </svg>{" "}
        戻る
      </Link>

      <form className="animate-in flex-1 flex flex-col w-full justify-center gap-2 text-foreground">
        <h2 className="font-bold ">新しいパスワードを入力してください。</h2>
        <label className="text-md" htmlFor="password">
          パスワード
        </label>
        <input
          className="rounded-md px-4 py-2 bg-inherit border mb-6"
          type="password"
          name="password"
          placeholder="••••••••"
          required
        />
        <SubmitButton
          formAction={resetPass}
          className="bg-green-700 rounded-md px-4 py-2 text-foreground mb-2"
          pendingText="更新中..."
        >
          パスワード更新
        </SubmitButton>
        {searchParams?.message && (
          <p className="mt-4 p-4 bg-foreground/10 text-foreground text-center">
            {searchParams.message}
          </p>
        )}
      </form>
    </div>
  );
}
リンクに付随したトークンを利用し、正しいセッション情報に更新した上で、ユーザのパスワードを更新しています
supabase.auth.exchangeCodeForSession(searchParams.code);
const { error } = await supabase.auth.updateUser({ password: password });
⑥:ユーザ情報ページ
いわゆるユーザのマイページになります。
後々ここにコンテンツを追加して様々な情報を更新できるようにします。
現状はユーザタイプの変更のみ行えるようにします。
app/userpage/page.tsx
import Header from "@/components/Header";
import Footer from "@/components/Footer";
import { createClient } from "@/utils/supabase/server";
import { redirect } from "next/navigation";
import UserInfo from "@/components/UserInfo";

export default async function UserPage() {
  const supabase = createClient();

  const {
    data: { user },
  } = await supabase.auth.getUser();

  if (!user) {
    return redirect("/login");
  }

  return (
    <div className="flex-1 w-full flex flex-col items-center">
      <Header />

      <UserInfo></UserInfo>

      <Footer />
    </div>
  );
}
components/UserInfo.tsx
ユーザ情報ページの要素をユーザごとに変更するWrapperです。
"use client";
import Link from "next/link";
import { createClient } from "@/utils/supabase/client";
import { useEffect, useState } from "react";
import { userType } from "@/utils/usertype";
import { Database } from "@/types/supabase";
import { userInfoContentsType } from "@/utils/userinfocontentstype";
import MainContents from "./userinfo/MainContents";

export default function UserInfo() {
  const [usertype, setUsertype] = useState<userType>(userType.none);
  const [userInfoContents, setUserInfoContents] =
    useState<userInfoContentsType>(userInfoContentsType.none);
  const supabase = createClient();

  const getUsertype = async () => {
    const { data, error } = await supabase.from("mst_user_type").select();
    if (data) {
      const data_usertype: Database["public"]["Tables"]["mst_user_type"]["Row"] =
        data[0];
      switch (data_usertype.user_type) {
        case "job_seeker":
          setUsertype(userType.job_seeker);
          setUserInfoContents(userInfoContentsType.job_seeker_basic);
          break;
        case "company":
          setUsertype(userType.company);
          setUserInfoContents(userInfoContentsType.company_basic);
          break;
        case "admin":
          setUsertype(userType.admin);
          break;

        default:
          break;
      }
    }
  };

  useEffect(() => {
    getUsertype();
  }, []);

  return (
    <div className="animate-in flex-1 flex gap-20 opacity-0 max-w-4xl px-3">
      {usertype == userType.job_seeker ? (
        <>
          <aside
            id="default-sidebar"
            className="w-48 h-auto transition-transform -translate-x-full sm:translate-x-0"
            aria-label="Sidebar"
          >
            <div className="h-full px-3 py-4 overflow-y-auto bg-gray-50 dark:bg-gray-800">
              <ul className="space-y-2 font-medium">
                <li
                  className="text-center p-2 text-gray-900 rounded-lg hover:bg-gray-100"
                  onClick={() =>
                    setUserInfoContents(userInfoContentsType.job_seeker_basic)
                  }
                >
                  登録情報
                </li>
              </ul>
            </div>
          </aside>
          <main className="flex-1 flex flex-col gap-6 w-full">
            <MainContents contentsType={userInfoContents}></MainContents>
          </main>
        </>
      ) : usertype == userType.company ? (
        <>
          <aside
            id="default-sidebar"
            className="w-48 h-auto transition-transform -translate-x-full sm:translate-x-0"
            aria-label="Sidebar"
          >
            <div className="h-full px-3 py-4 overflow-y-auto bg-gray-50 dark:bg-gray-800">
              <ul className="space-y-2 font-medium">
                <li
                  className="text-center p-2 text-gray-900 rounded-lg hover:bg-gray-100"
                  onClick={() =>
                    setUserInfoContents(userInfoContentsType.company_basic)
                  }
                >
                  登録情報
                </li>
              </ul>
            </div>
          </aside>
          <main className="flex-1 flex flex-col gap-6 w-full">
            <MainContents contentsType={userInfoContents}></MainContents>
          </main>
        </>
      ) : usertype == userType.admin ? (
        <>管理者ページ</>
      ) : (
        <>
          <aside
            id="default-sidebar"
            className="w-48 h-auto transition-transform -translate-x-full sm:translate-x-0"
            aria-label="Sidebar"
          >
            <div className="h-full px-3 py-4 overflow-y-auto bg-gray-50 dark:bg-gray-800">
              <ul className="space-y-2 font-medium"></ul>
            </div>
          </aside>
          <main className="flex-1 flex flex-col gap-6 w-full">
            <MainContents contentsType={userInfoContents}></MainContents>
          </main>
        </>
      )}
    </div>
  );
}
components/userinfo/MainContents.tsx
現在はユーザタイプの変更のみですが、今後別コンテンツを表示できるように共通化できるページとして作成します。
import { userInfoContentsType } from "@/utils/userinfocontentstype";

type Props = {
  contentsType: userInfoContentsType;
};

export default function MainContents({ contentsType }: Props) {
  return (
    <>
      {contentsType == userInfoContentsType.job_seeker_basic ? (
        <p>求職者ページ</p>
      ) : contentsType == userInfoContentsType.company_basic ? (
        <p>企業ページ</p>
      ) : (
        <></>
      )}
    </>
  );
}
⑦:その他ファイル
components/SubmitButton.tsx
フォームへの送信を行った際に待ち時間のローディングを表現できるようになっているボタンのコンポーネントです。基本的にはデフォルトのログイン用のボタンと同じ仕組みです。
"use client";

import { useFormStatus } from "react-dom";
import { type ComponentProps } from "react";

type Props = ComponentProps<"button"> & {
  pendingText?: string;
};

export function SubmitButton({ children, pendingText, ...props }: Props) {
  const { pending, action } = useFormStatus();

  const isPending = pending && action === props.formAction;

  return (
    <button {...props} type="submit" aria-disabled={pending}>
      {isPending ? pendingText : children}
    </button>
  );
}
utils/userinfocontentstype.ts
どのコンテンツを利用するかを判別するためのenumです。
export enum userInfoContentsType {
  job_seeker_basic,
  company_basic,
  none,
}
utils/usertype.ts
同様にユーザタイプが何であるかを判別するためのenumです。
export enum userType {
  job_seeker,
  company,
  admin,
  none,
}
ここまででコードの作成は以上です。
実際に動くかどうか確認してみましょう。
実装の確認
まず、`.env.local`を確認し、`NEXT_PUBLIC_USER_TYPE`が下記の設定になっていることを確認します。
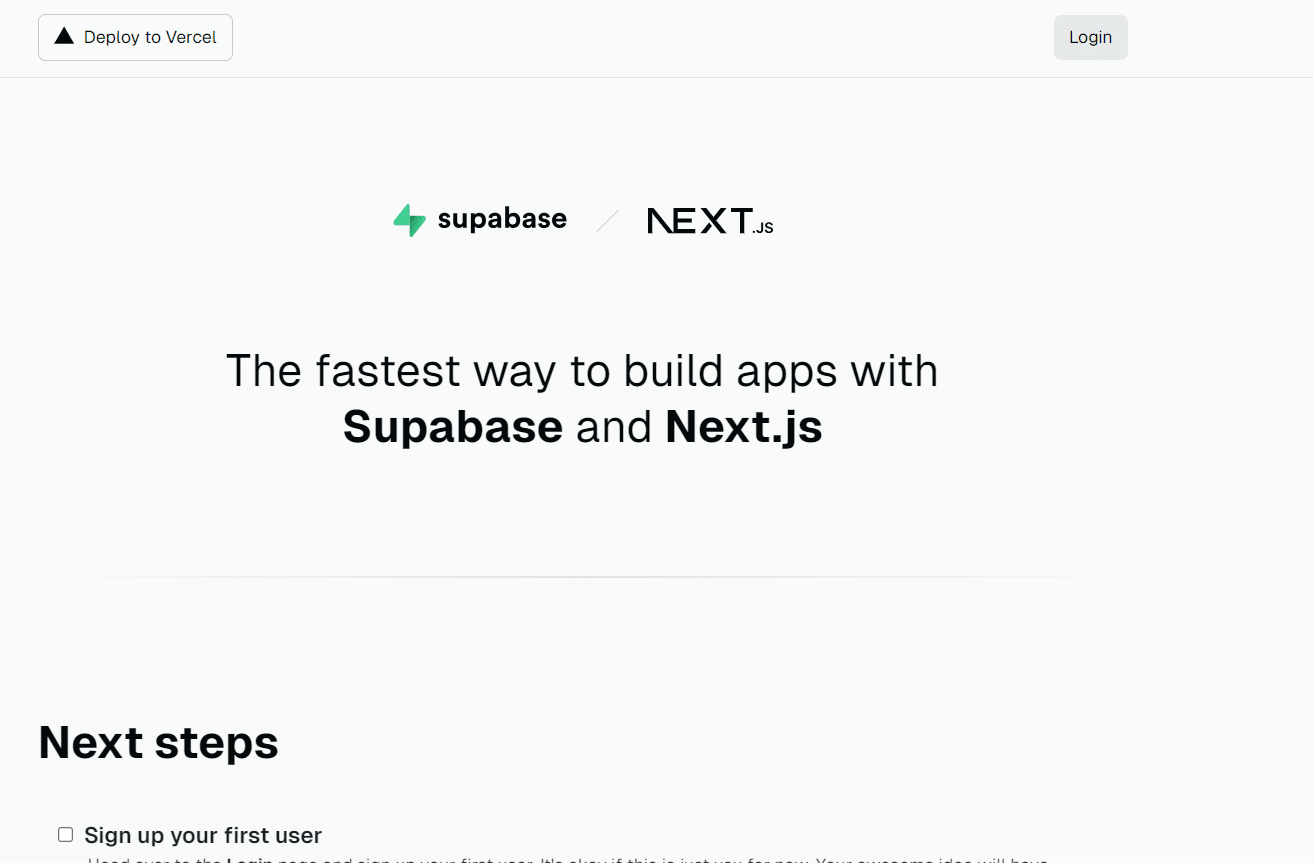
NEXT_PUBLIC_USER_TYPE=job_seekerトップページにアクセスしましょう。
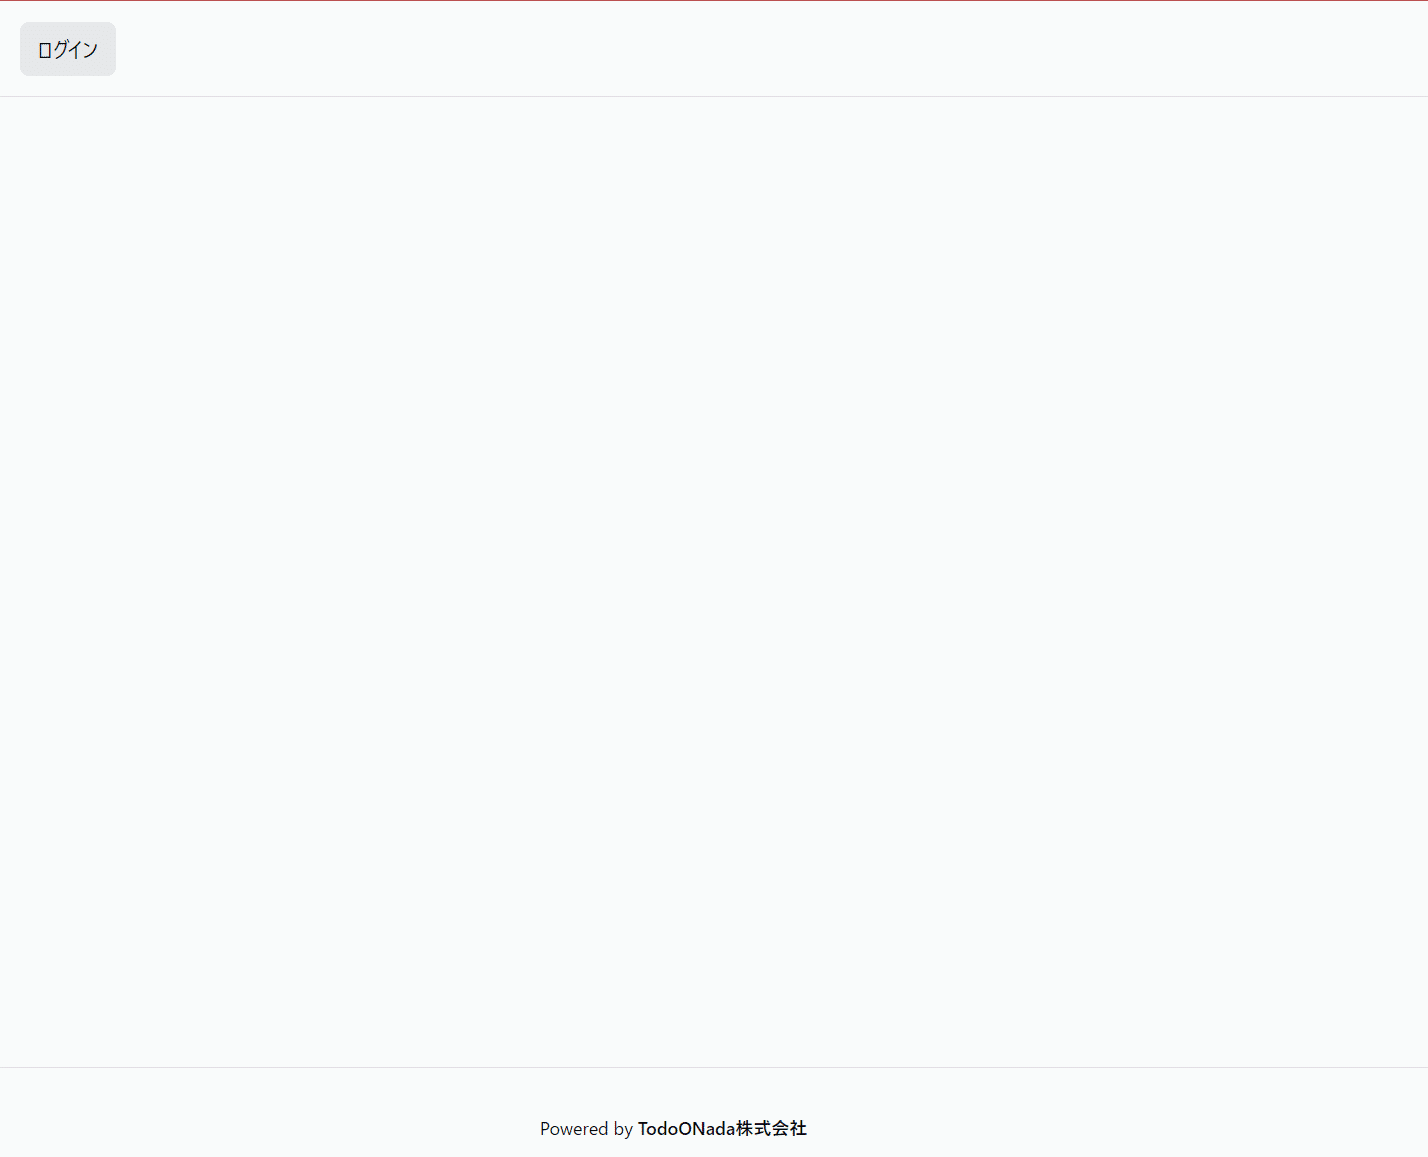
ログイン以外に要素がない状態ですが、現状はOKです。
ログインボタンを押すと、下記の画面が表示されるのでユーザ登録を行いましょう。
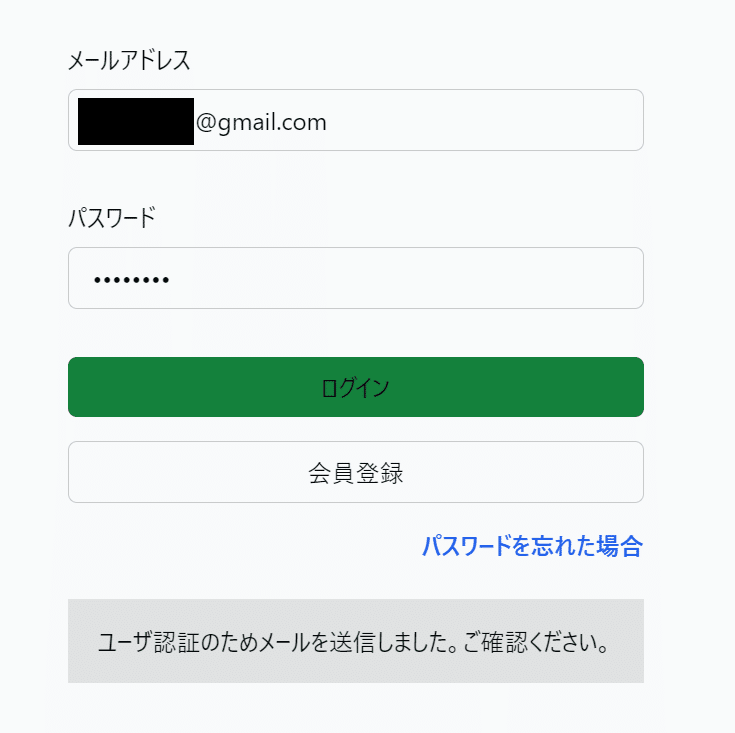
登録ボタンを押すとメールが送信されるため、そのメールにアクセスしてユーザ登録を完了させます。
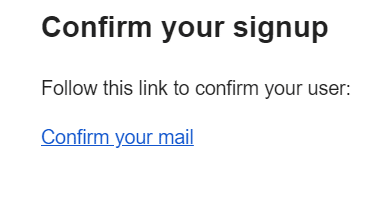
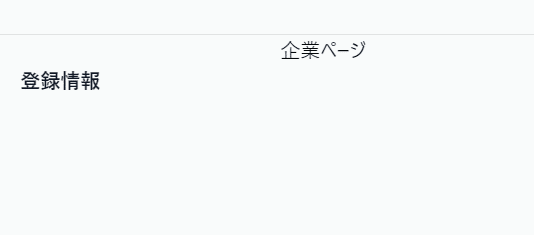
リンクをクリックすると、求職者ページと画面に表示されます。

現在のユーザタイプテーブルを見ると、自動で作成されたテーブルが追加されていると思いますが、
こちらのユーザタイプも`job_seeker`になっていることが確認できます。

次に`.env.local`のユーザタイプを企業に変更して確認してみます。
NEXT_PUBLIC_USER_TYPE=companyこの状態で会員登録~ログインまで対応すると、企業ページと画面に表示されユーザタイプが切り替わっていることがわかります。
テーブル情報も同じくユーザタイプが`company`になります。

最後にパスワードリセットも確認してみます。
一度ログアウトしたうえでログイン画面の「パスワードを忘れた場合」をクリックします。

メールアドレスを入力し送信ボタンを押すと、メールを確認する旨のメッセージが表示されるためメールを確認しましょう。
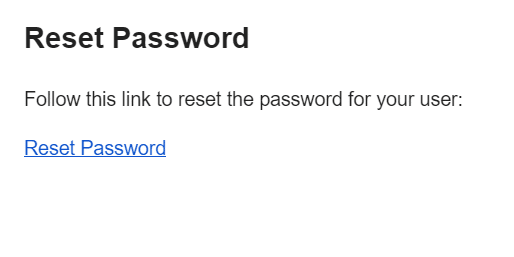
リセット用のリンクが送られているためクリックします。
新しいパスワードを入れて更新します。
もう一度ログインすると、新しいパスワードが利用できることを確認できるはずです。
Vercelへのデプロイ
※Vercelのアカウント作成ができていることが前提です。
実装の基本が作成できたため、Vercelにデプロイして確認できるようにしてみましょう。
今回、求職者と企業のドメインを分けて作成したいため、まずは求職者側から作成していきます。
事前のSupabase設定
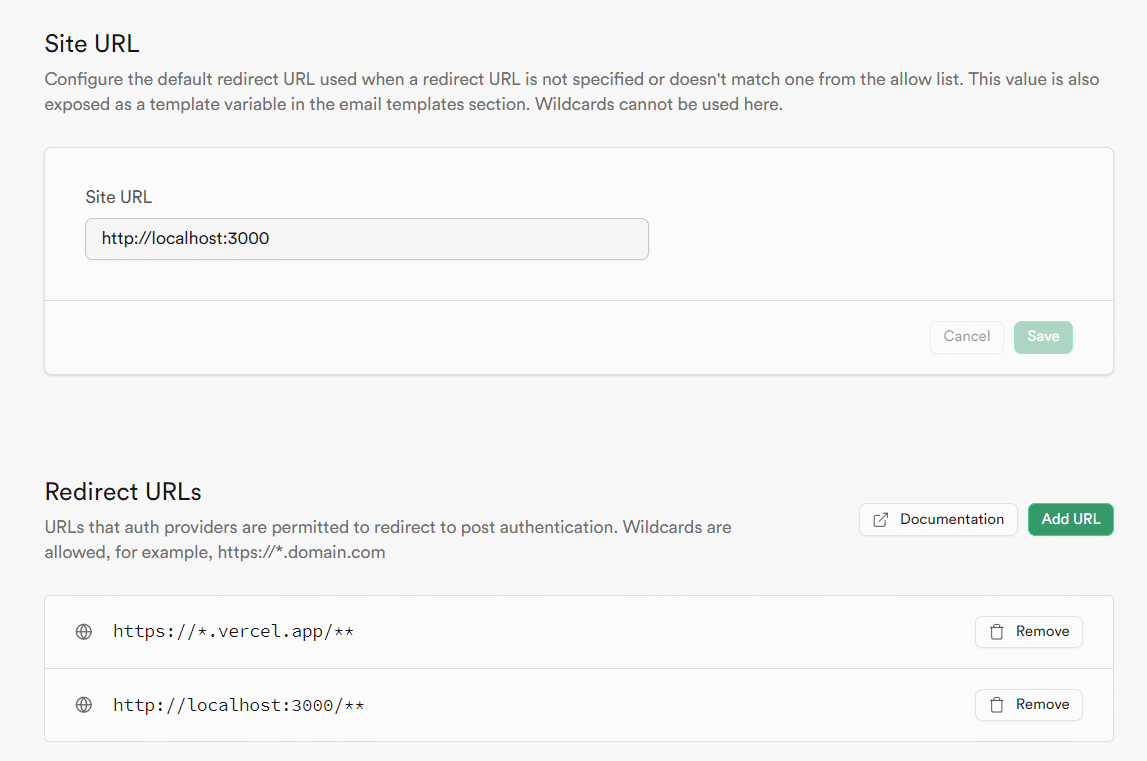
Vercelにデプロイする前に、サインアップ時やメールリセット時のリダイレクトを正しく行うため、
Supabaseのダッシュボードから`Authentication`→`URL Configuration`で下記のように設定します。
求職者のプロジェクト作成
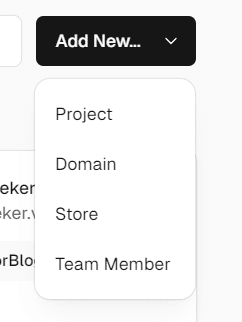
Vercelのダッシュボードにアクセスし、新しいプロジェクトを作成。
今回のプロジェクトのGitリポジトリからインポートを選択します。
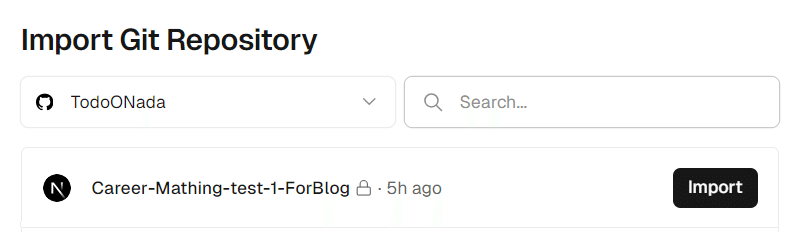
その後、開かれるデプロイページでプロジェクト名を`career-matching-job-seeker`とし、`Environment Variables`に.env.localに設定した変数をすべて追加しましょう。
その後`Deploy`ボタンを押して完了です。
企業のプロジェクト作成
求職者のサイトへ、同じように新しいプロジェクトを作成します。
デプロイページでプロジェクト名は`career-mathing-company`とし、
`Environment Variables`に.env.localに設定した変数をすべて追加しましょう。
その後`Deploy`ボタンを押して完了です。
確認
実装の確認の時と同様にちゃんとログイン/パスワードリセット/ユーザタイプの反映がされるか確認してみて下さい。
また、今後はgithubのmasterにプッシュするたびにビルドされ、別ブランチに関してもプレビューが作成されるようになるため、本番環境もこれで確認が可能になります。
これで今回の作成は以上になります!
次回はユーザのプロファイル変更ができるようにします。
その他参考資料など
序盤にもお伝えしましたが、今回ご紹介するコードは、その『マッチングワン』でも使われているコードとなります。
本記事で紹介したようなプロダクトを開発されたい場合は、是非お問い合わせください。
またTodoONada株式会社では、この記事で紹介した以外にも、Supabase・Next.jsを使ったアプリの作成方法についてご紹介しています。
下記記事にて一覧を見ることができますので、ぜひこちらもご覧ください!https://libproc.com/category/supabase/
- Next.js + SupabaseでTodoアプリ作成 CRUDの基本を学ぼう
- FirebaseとSupabaseの機能、料金、セキュリティ、AI観点などを含めて徹底比較
- Next.js とSupabaseで求人マッチングアプリを作る①
- 素早くアプリを作りたい! Vercel+Supabaseでプロジェクト開発
- Supabaseの機能一覧・解説 オープンソースのFirebase代替mBaaS
- Supabase CLIコマンド一覧
- Supabase RealtimeのBroadcast, Presenceを利用したキャンバス共有アプリを作る
- Supabaseのローカル開発環境を構築して開発体験を向上させつつ料金も節約
- Next.js + Supabaseでリアルタイムチャットを作ろう
- Next.js + Supabaseでソーシャルログインを実装する方法
- Next.js+Supabaseで認証機能を実装しよう【コード付き完全ガイド】
- Supabase + Next.jsで画像投稿アプリを最適化する(画像圧縮、ファイルサイズ制限、ファイルのアップロード数制限)
- OpenAI Embeddings API+ Supabase Vector Database + Next.jsでベクトル検索を実装する
- Supabase + AWS CognitoでAmplifyを利用せずサードパーティ認証する
- Supabaseでデータ更新があった時にSlack通知を送る
- Supabase Branchingでプレビュー環境を手に入れて開発体験を向上する
- Next.js + SupabaseでGraphQLを利用する方法
- SupabaseのEdge FunctionsとSendGridでメールを一斉送信する
- Supabaseで匿名認証とアカウントの本登録への昇格の方法
- Next.js + SupabaseでStorageを利用した画像投稿アプリ作成
- Next.js + SupabaseでRLSを利用して安全なアプリを作ろう。
- Next.js + SupabaseでAuth + Storageのストレージサービスを作る方法
- Next.jsとSupabaseで認証機能ありのリアルタイムチャットを作成する。
- Next.jsとSupabaseで認証つきチャットアプリを作成する(SNS風UI)
- Next.js + SupabaseでSMS認証を作成する方法
- Next.jsとSupabaseで全文検索を実装する方法
- Next.jsとSupabaseで作成したチャットアプリにお知らせ機能を実装する
- Nextjs + SupabaseでSupabaseのStorage Image Transformationsを利用する方法
- Supabase vs Neonの比較。機能や料金、セキュリティ、AIを徹底比較
- Supabaseのセルフホスティングをできるだけ安く行う方法
- Supabase + Cognitoの連携で外部連携を試す
- Supabase CLIのTesting機能を利用する
- Supabaseを利用する際に設定しておきたい項目
お問合せ&各種リンク
- お問合せ:GoogleForm
- ホームページ:https://libproc.com
- 運営会社:TodoONada株式会社
- Twitter:https://twitter.com/Todoonada_corp
- Instagram:https://www.instagram.com/todoonada_corp/
- Youtube:https://www.youtube.com/@todoonada_corp/
- Tiktok:https://www.tiktok.com/@todoonada_corp
presented by

